Hello Squadron
I just started playing with Swiss Life’s Open Source repository and wanted to highlight a jewel on it, Squadron. Which surprised me how easy and simple it is to use and that it solves many issues I found earlier on in regards of testing some Azure components. Concretely how to Mock them so the real services/products are not needed for the tests.
What’s Squadron?
Squadron is a framework with the purpose of easily deploying dependant services and components without any overhead, whereas they are in the cloud. So, say goodbye to having to deploy an environment in Azure for just testing against it in local and/or Azure DevOps. Or having to develop a complex mock or deploy and wrap a service in local such as MS SQL.
How does it work?
It provides infrastructure through Container and Cloud Providers. Provides full test issolation. For doing so, in case of Container Providers, it uses docker and supports the following services:
- MongoDB
- MS SQL
- PostgresSQL
- ElasticSearch
- RabbitMQ
- Redis
- RavenDB
- Neo4j
In case of Cloud Providers, Squadron supports the following:
- Azure ServiceBus
- Azure Storage
And a few more are in the works, such as Kafka, MySQL, Azure Event Hubs…
So, let’s get to it ;)
We will now do a step by step, follow along HOL on getting started with Squadron ;) So open your Visual Studio or tool of preference, either it is VS, VS Code or Rider and follow me on the upcoming steps. Additionally you can watch a walkthrough on the accompaigning video on my Azure Samurai video channel (note, this is pending to be published… won’t be long though). Note: The code for this Squadron Quickstart can be found in GitHub
1. Enable Hyper-V (In case you have windows)
- Open a PowerShell console as Administrator.
-
Run the following command:
Enable-WindowsOptionalFeature -Online -FeatureName Microsoft-Hyper-V -All - Otherwise, you can do this through settings, for this:
- Go to ‘Apps and Features’.
- Select ‘Programs and Features’.
- select ‘Turn Windows Features on or off’.
- Select ‘Hyper-V’ and click the OK button.
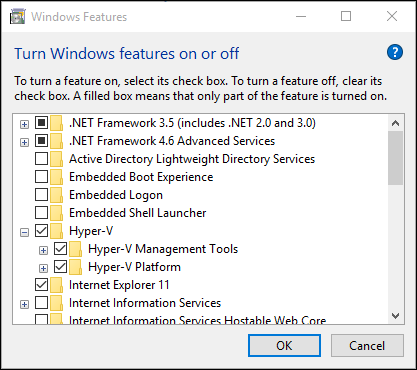
- Restart your computer (you might want to wait until Docker Desktop is installed for restarting your computer).
2. Install Docker desktop
- Go to the Docker Desktop page, download and install it.
- Restart your computer.
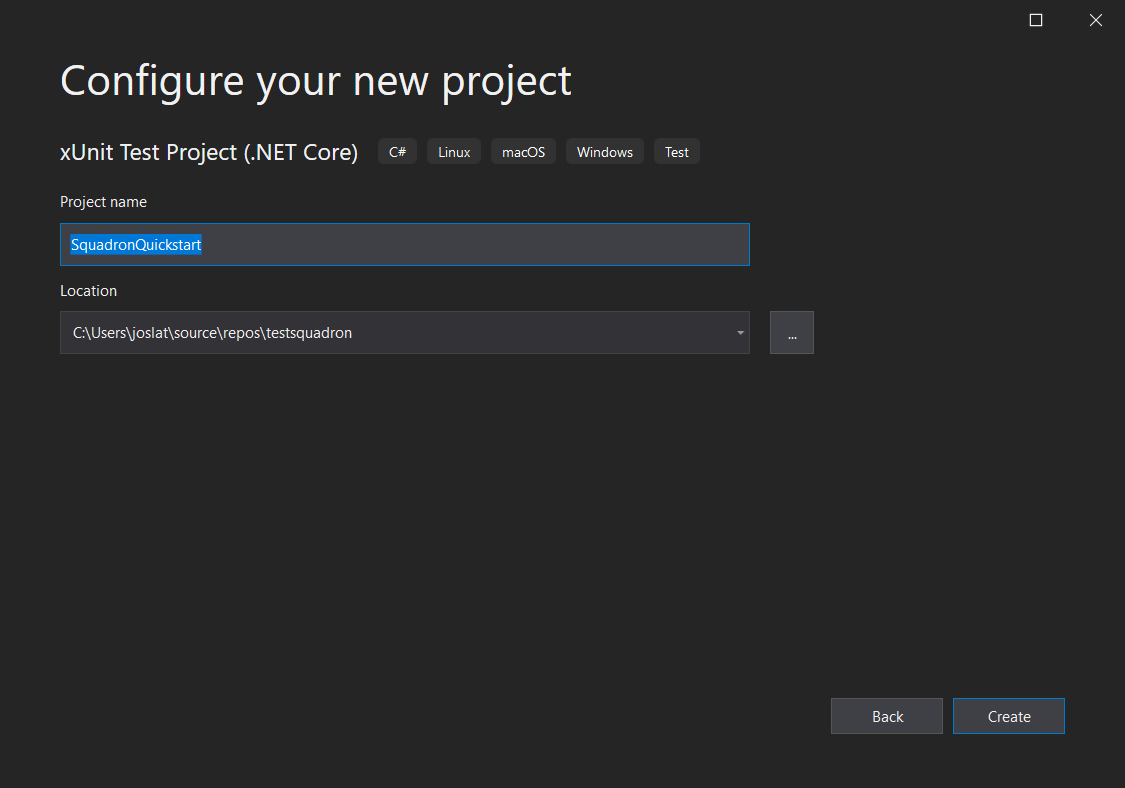
3. Code it!
- Open Visual Studio or your favorite IDE for coding.
- Create a xUnit test project with .NET Core, and name it “SquadronQuickstart”
- Update the xUnit & XUnit.runner.visualstudio NuGet packages to 2.4.1 or later, feel free to udpate the rest of the packages to latest and greatest (but stable) if you’d like.
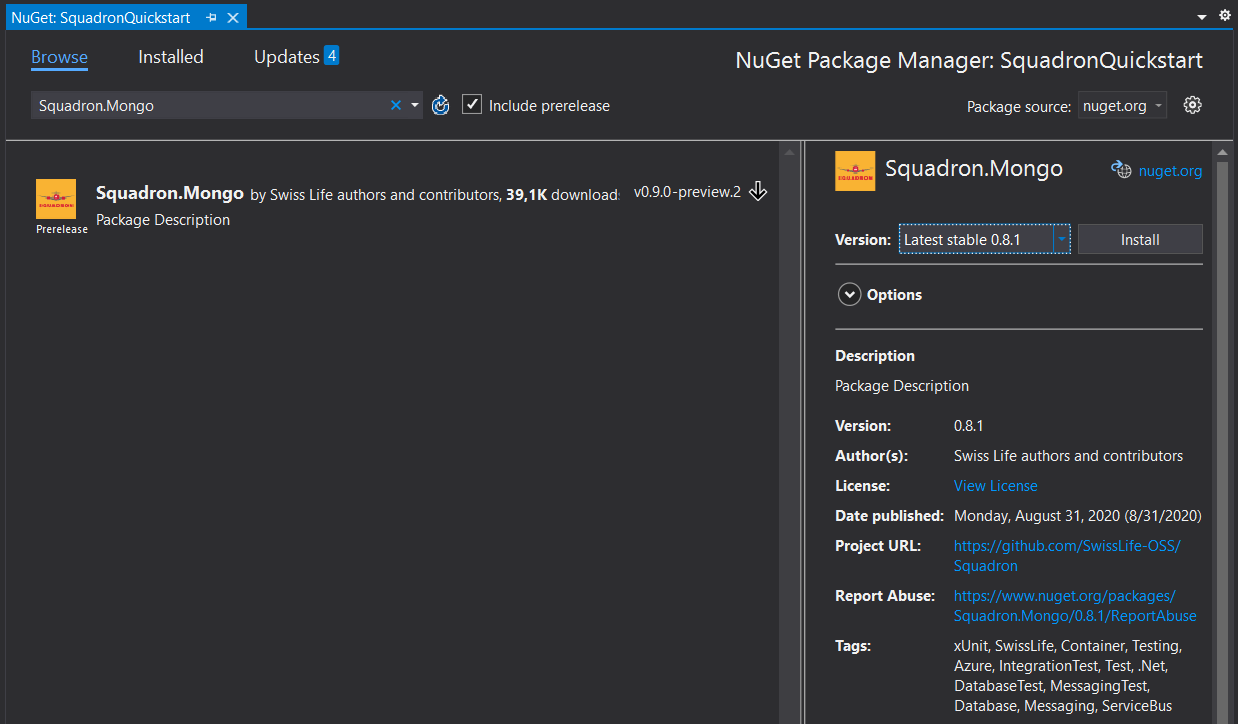
- Add the “Squadron.Mongo” NuGet package. You can get the latest stable if you’d like.
- Add the User class, a simple class for containing the data that we will store in the Mock Database server, with the following code:
    public class User
    {
        public string Id { get; set; }
        public string Name { get; set; }
        public string Email { get; set; }

        public static User CreateSample()
        {
            return new User
            {
                Id = "A1",
                Name = "John",
                Email = "john.sample@squadron.io"
            };
        }
    }
- Add the UserRepository class, where we will implement some methods that will work with the MongoDB database, with the following code:
using System.Collections.Generic;
using System.Threading.Tasks;
using MongoDB.Driver;
using MongoDB.Driver.Linq;

namespace SquadronQuickstart
{
    public class UserRepository
    {
        private readonly IMongoDatabase _mongoDatabase;

        public UserRepository(IMongoDatabase mongoDatabase)
        {
            _mongoDatabase = mongoDatabase;
        }

        public async Task AddAsync(User user)
        {
            IMongoCollection<User> col = _mongoDatabase.GetCollection<User>("users");
            await col.InsertOneAsync(user, options: null);
        }

        public async Task<IEnumerable<User>> GetAllAsync()
        {
            IMongoCollection<User> col = _mongoDatabase.GetCollection<User>("users");
            return await col.AsQueryable().ToListAsync();
        }

        public Task<User> GetUserAsync(string id)
        {
            IMongoCollection<User> col = _mongoDatabase.GetCollection<User>("users");
            Task<User> user = col.AsQueryable()
                .Where(x => x.Id == id)
                .FirstOrDefaultAsync();
            return user;
        }
    }
}
- Add the following code to the UnitTest1.cs class:
using Xunit;
using Squadron;
using System.Threading.Tasks;

namespace SquadronQuickstart
{
    public class AccountRepositoryTests
        : IClassFixture<MongoResource>
    {
        private readonly MongoResource _mongoResource;

        public AccountRepositoryTests(
            MongoResource mongoResource)
        {
            _mongoResource = mongoResource;
        }

        [Fact]
        public async Task Repository_WhenAddingAndRetrievingUser_WeGetAMatchingUser()
        {
            //arrange
            var user = User.CreateSample();
            var db = _mongoResource.CreateDatabase();
            var repo = new UserRepository(db);

            //act
            await repo.AddAsync(user);
            User createdUser = await repo.GetUserAsync(user.Id);

            //assert
            Assert.Equal(user.Email, createdUser.Email);
        }
    }
}
- What we just did with IClassFixture
and the implementation is use the Resource provided by **Squadron.Mongo** which is injected in the class constructor. The Resource in this case will be resolved by a container but can also be resolved by a cloud service.
4. Run it! (More precisely, test it!)
- Now that we are done with coding. We can now run the test. In Visual Studio we can go to Test > Run all tests. The tests should run, a container with Docker will be launched transparently and once the test is done, the container will be stopped and removed.
- Meanwhile the test is running, open Docker Desktop and watch the containers being created and disposed. This is all done by Squadron, which manages its lifecycle by creating and removing it. You should see something like:

Concluding
Pretty cool, right? all the hassle of having to manually prepare containers for test is gone, and all the necesary code is minimized by Squadron. But there is even more as we have a managed lifetime for each Resource, container or cloud. For each Test Fixture (read Test Class) we can control with precision our test environments and this works fine even for parallel execution of tests . In one of my latests projects we had to manually deploy the image and code some database wrapper for the local and test environment. But this container was shared for all the tests.
You can read about them on the official post regarding its release or go to get the code right from the source. Or if you’d rather not read, but watch, there is a nice introduction to Squadron (and Snapshooter) on a recent .NET Zurich Developers event.
Next!
On a next post I will show how to use Squadron with a Cloud Service. I also think that it shines when combined with Snapshooter.
In addition, I plan to publish a series of videos at the Azure Samurai channel on how to use Squadron for testing in Azure, which will go nicely along this and the upcoming post.
Have fun!