Today: Consuming GraphQL with Blazor!
Continuing where we left off on our last post.. Today we are going to build a very simple Blazor app, setup StrawberryShake and consume the StarWars GraphQL API that we created together on our previous post.. We are going to do this with the same library that we did last time, HotChocolate and concretely with a client toolset that will make our life easier (way easier) I am talking about StrawberryShake… The .NET Client Tooling that our friends from HotChocolate are finishing.
Step 1: Install StrawberryShake
Go to the command line and execute this command:
dotnet tool install StrawberryShake.Tools --version 11.0.0-preview.98 –local
That’s it, now we can use it on our next step.
Step 2: Create a Blazor app & add the necesary packages
Without leaving the command line, execute this command:
dotnet new blazorwasm -o BlazorSWAPI
This will create a Blazor application based on WebAssembly (Client). And once the app is created from the specified blazorwasm template, we will add the packages with the following commands, after moving to the project directory.
For StrawberryShake:
dotnet add package StrawberryShake --version 11.0.0-preview.98
For Http extensions:
dotnet add package Microsoft.Extensions.Http --version 3.1.1
For DI support:
dotnet add package Microsoft.Extensions.DependencyInjection --version 3.1.1
Next we can proceed to open the Blazor app with the code . command.
Step 3: Start the StarWars API before coding the Blazor bits
Before we go on, It will be good get the last post StarWars GraphQL API up and running to start consuming it.
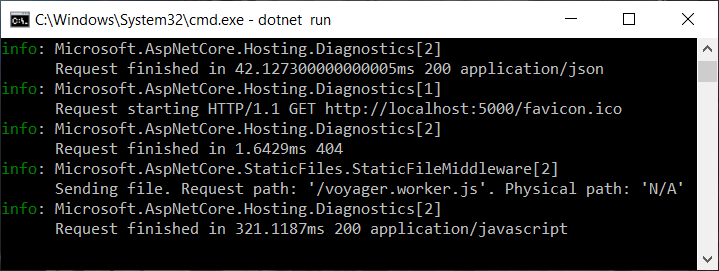
With a command prompt, go to the folder it is located and execute the dotnet run command.
(remember we configured the port in the code, so we know exactly how to access and on which port). It should look like follows:
To check it works, we can open a browser and type in: http://localhost:5000/graphql/voyager/
If everything goes as it should, we should see the following graph notation of our server Schema:
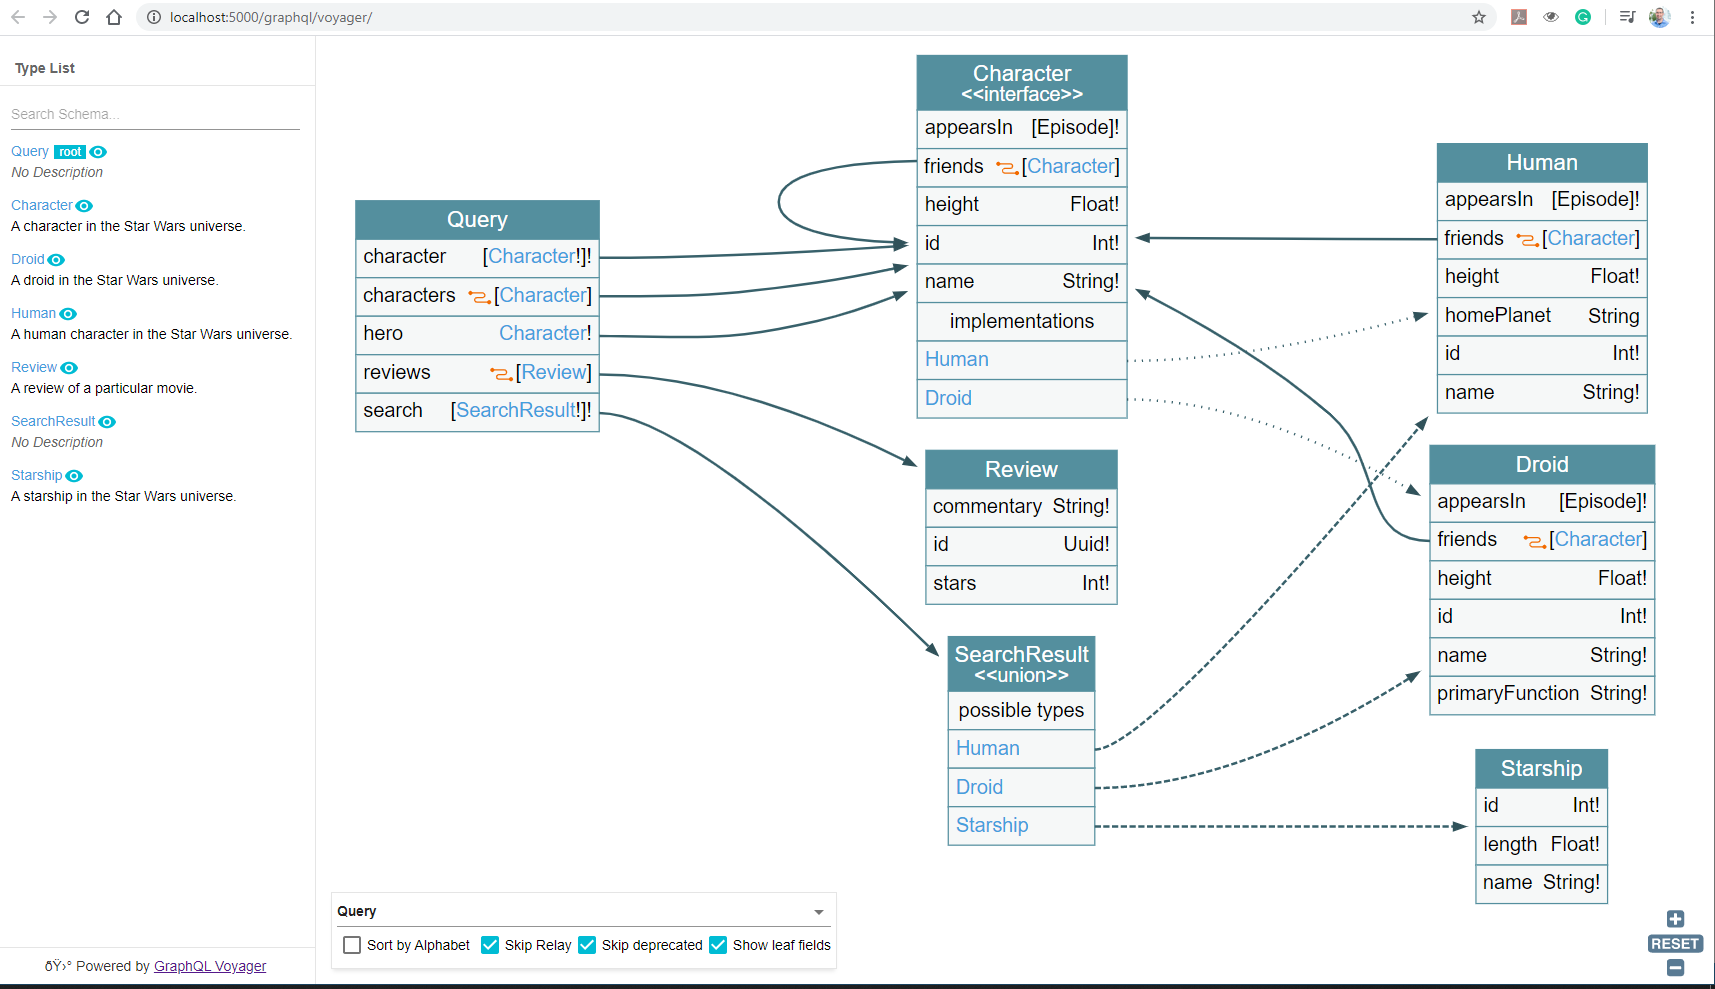 This is a great way to visualize our GraphQL documentation, which is strongly typed and delivered to us through the Introspection response provided by our GraphQL Server “per-se”.
It is an interactive graph, which is a really good tool for designing or discussing on the data model. Give it a go and play with it.
This is a great way to visualize our GraphQL documentation, which is strongly typed and delivered to us through the Introspection response provided by our GraphQL Server “per-se”.
It is an interactive graph, which is a really good tool for designing or discussing on the data model. Give it a go and play with it.
You can also open “Banana Cakepop” and query it or navigate to http://localhost:5000/graphql/playground/ and type the following query:
query{
  characters{
    nodes{
      name
      height
    }
  }
}
Well, after playing a bit, lets get back to our IDE build our app.
Step 4: Add the Strawberry Shake magic to our Blazor App
Coming back to our VS Code (or Studio), we open the terminal in order to get our server Schema. We type the following command:
dotnet graphql init http://localhost:5000/graphql -n StarWars
We should observe that a StarWars.graphql file has been added to our project. This is done through the tooling and gets via Introspection all the Schema the server offers, Queries, Mutations and Subscriptions we can use.
It should look more or less like this:

We will add a new file with a query that we want to make to the backend, we can name it with an original name as “Queries.graphql” and add the following GQL query inside:
query getCharacters {
  characters{
    nodes{
      name
      height
    }
  }
}
Note: we have to give it a name in order to invoke it.
After this we can execute dotnet build on the Terminal to build our application. Note that if we build it without the query file, we will get an unhandled exception (As of now, bear in mind that Strawberry Shake is in preview) And now, the magic is done,on the Build process, the code generation was executed and created a folder named “Generated” which contains all that we need to use GraphQL in our application to execute the GQL in the Queries.graphql file.
It’s an interestingly smart code and it’s nicely written too:
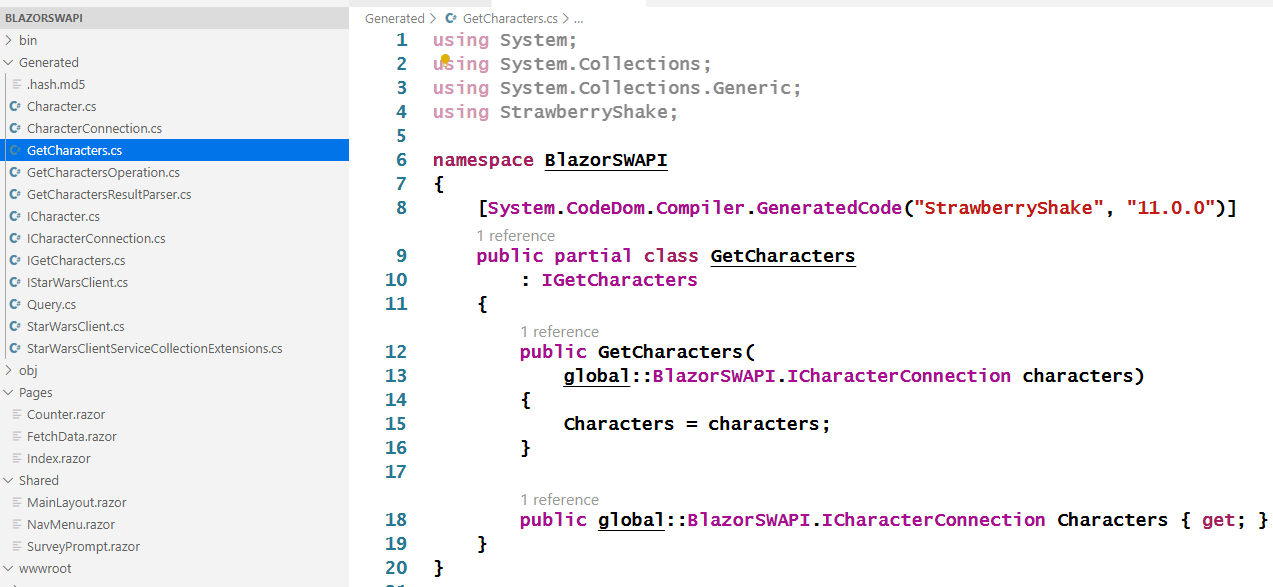
Note that on the StarWarsClient.cs, we can find that the getCharacters query has generated the getCharactersAsync function. We have all the code that we need to execute our queries, generated for us, no more no less.
As a simple test to verify that all this is strongly typed we can change our Query.graphql. Let’s rename “name” to “namethiswillraiseanerror” and execute dotnet build again. We will get a build error. An error with a clear pointer where and what caused it. That’s important.
Step 5: Build the Blazor bits
We are almost there! now we will add some easy-peasy Blazor bits; some project changes, components, call to the service, etc…
First, we will open the project file and add the following lines inside the
    <LangVersion>8.0</LangVersion>
    <Nullable>enable</Nullable>
This is in order to enable nullables. We might need to rebuild in order to regenerate the code.
Note: In VS 2019, StrawberryShake does its magic at design time. Any change will trigger the code regeneration. In future versions, this will be the same for VS Code.
Next, we go into Program.cs and add to the Main function the code to add the StarWars GraphQL API Client and to add a httpClient to access it. The Main function should end looking like this:
public static async Task Main(string[] args)
{
    var builder = WebAssemblyHostBuilder.CreateDefault(args);
    builder.RootComponents.Add<App>("app");

    builder.Services.AddStarWarsClient();
    builder.Services.AddHttpClient(
        "StarWarsClient",
        client =>{
            client.BaseAddress= new Uri("http://localhost:5000");
        });

    await builder.Build().RunAsync();
}
Note: this will match the content of the berry.json file, also created by the Strawberry Shake tooling:
{
    "Schemas": [
        {
            "Name": "StarWars",
            "Type": "http",
            "File": "StarWars.graphql",
            "Url": "http://localhost:5000/graphql"
        }
    ],
    "ClientName": "StarWarsClient"
}
We go into the Pages folder and add the “HeroComponent.razor” component with the following code:
<li>
    Hero: @Hero.Name Height: @Hero.Height
</li>

@code {
    [Parameter]
    public ICharacter Hero { get; set; }
}
This component will accept a class of type ICharacter and display it, pretty dumb so far.
We add a HeroList.razor component next with the following code:
<div>
  <ul >
    @if(IsLoading) {
        <h3>Loading Heroes...</h3>
    }
    else if (Heroes?.Nodes is { })
    {
        @foreach (var hero in Heroes.Nodes)
        {
            <HeroComponent Hero="@hero" />
        }
    }
  </ul>
</div>

@code {
    [Parameter]
    public bool IsLoading { get; set; }

    [Parameter]
    public ICharacterConnection? Heroes { get; set; }
}
This component has a IsLoading boolean parameter that determines if the heroes are loaded or not. If they are not it will display “Loading heroes…” and if they are loaded, display them with a foreach that iterates on the Heroes.Nodes IReadOnlyList and display each one of them with the HeroComponent. The list of Heroes is delivered through the Heroes parameter.
Next we will add a “HeroesPage.razor” file, which will contain a page and all the logic for calling our GraphQL API retrieving the heroes and showing them. We will add the following code to it:
@page "/heroes"
@inject IStarWarsClient StarWarsClient;

<h1>heroes</h1>
<p>Sometime in a galaxy far, far away...</p>

<HeroList Heroes="@_heroes" IsLoading="@_isLoading" />

@code {
  private bool _isLoading = true;
  private ICharacterConnection? _heroes;

  protected override async Task OnInitializedAsync()
  {
    try
    {
      var result = await StarWarsClient.GetCharactersAsync();
      result.EnsureNoErrors();

      _heroes = result.Data!.Characters;
      _isLoading = false;
      StateHasChanged();
    }
    catch (System.Exception ex)
    {
        Console.WriteLine(ex.Message);
    }
  }
}
Basically we are adding the navigation path with @page, resolving the StarWarsClient that we registered in Program.cs, and then providing the HeroList component which has two parameters bound to the _heroes and _isLoading variables.
On the OnInitializedAsync() function we use the StarWarsClient to get our characters, we ensure that there are no errors and assign the resulting data to _heroes and set the _isLoading to false. We also set make a call to StateHasChanged() which tells the visual tree to refresh itself to the new data state.
Last but not least, we need to be able to reach this page, so we will add it to our menu… We will open the NavMenu.razor component and add the following <li/> Html list item:
<li class="nav-item px-3">
    <NavLink class="nav-link" href="heroes">
        <span class="oi oi-list-rich" aria-hidden="true"></span> Star Wars Heroes
    </NavLink>
</li>
Step 6: One last thing..
We need to go back to our project StarWars API and configure it to use CORS (Cross Origin Resource Sharing) as we will be referencing it from another URL.
We open the Startup.cs and on the ConfigureServices Function we add:
// Add CORS
services.AddCors();
And, on the Configure method we add the following configuration for CORS for the app, modifying the app configuration to look like:
app
    .UseRouting()
    .UseWebSockets()
    .UseGraphQL("/graphql")
    .UsePlayground("/graphql")
    .UseVoyager("/graphql")
    .UseCors(c => c.AllowAnyOrigin()
            .AllowAnyHeader()
            .AllowAnyMethod());
Then, coming back to the Blazor client app, we create a “Properties” folder and add a “launchSettings.json” file. We add the following content:
{
  "iisSettings": {
    "windowsAuthentication": false,
    "anonymousAuthentication": true
  },
  "profiles": {
    "Client": {
      "commandName": "Project",
      "launchBrowser": true,
      "environmentVariables": {
        "ASPNETCORE_ENVIRONMENT": "Development"
      },
      "applicationUrl": "http://localhost:5002"
    }
  }
}
Note: Thanks to Michael Staib for this tip on adding the lauchSettings.json, as I was a bit lost when I was missing the right “–urls” option syntax completely.
this will ensure that we do not try to reuse the port 5000 - used by the StarWars API ;)
Note: We could also use the “–urls” option with the url and port we want to enforce:
dotnet run --urls="http://localhost:5008"
But I’d say that this is better placed on our code, don’t you think? I hate repeating work..
Step 7: Run it!!
Yes, at last we can execute our work!
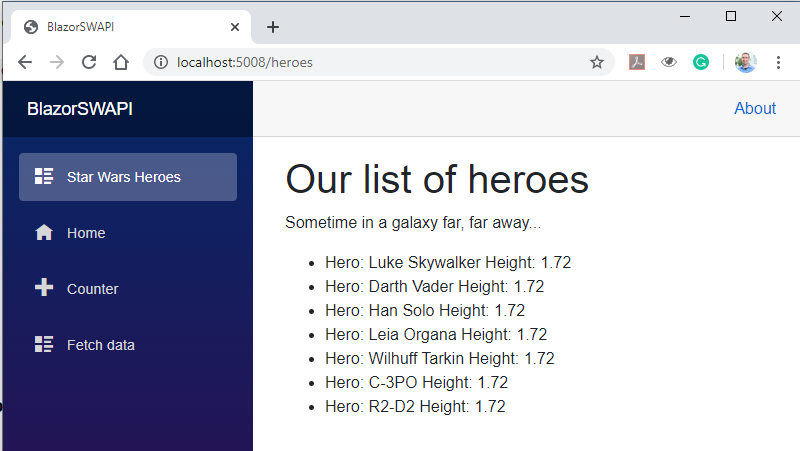
We can go to the Terminal and issue a dotnet run command (or the long version with the –urls option). It we can go to our menu entry “Star Wars Heroes” and we should see something similar as the following image:
Conclusion & Takeaways
Now we have seen how easy is to consume a GraphQL API with HotChocolate & Strawberry Shake. With the code generation features, we have all the code we need and together with it developing a Client app becomes a fairly straightforward development.
It is quite fast and the code generation helps in adapting to future changes (example: adding more fields to an entity) with no effort or a minimal one.
Oh, yes, and the code is available at the following GitHub repo here
happy coding!
Jose
PS: I leave some links if you are a bit more curious :)